Saving and storing seeds
Posted on
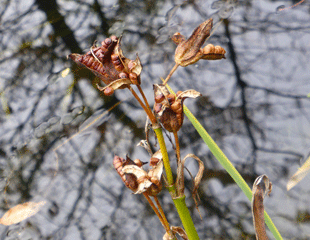 |
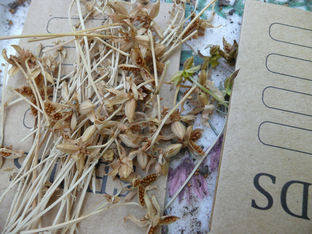 |
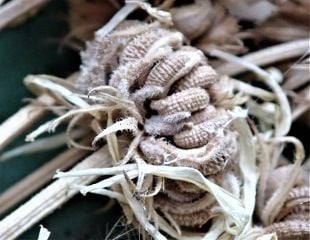 |
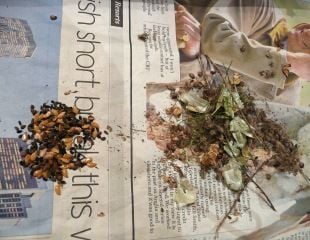 |
Posted on
 |
 |
 |
 |
Posted on
 |
 |
|
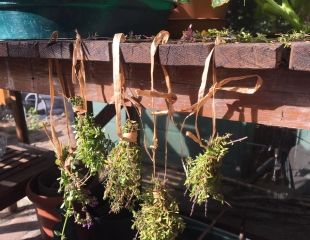
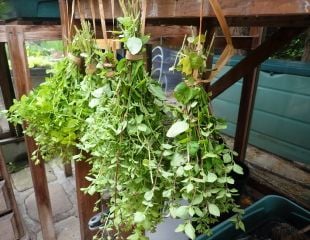
In August, when Thyme has finished flowering it needs to be trimmed back. This curtails its natural tendency to get leggy and keeps it in a neat shape. Don't throw away the prunings, they can be saved and used as dried herbs over winter.
You can dry them out in the oven on a very low heat, keeping a careful eye as they can go from nearly crisp to blacken very quickly. I think it is easier just to hang them in bunches in a warm place until completely dry. Then, using an ordinary screw top jam jar, clean the leaves from the branches into the jars ready to use.
In the first image Thyme is drying and in the second, Oregano. Both are herbs which respond well to this simple method of drying and will preserve well over winter. It’s nice when summer has long past to undo the lid of the jam jar and smell the dried herbs which you picked yourself. There are absolutely 100% as good as shop bought, free and no air miles. The supermarket Oregano I currently have in my cupboard states it is “the produce of more than one country” so it’s been around the world a bit. I hope I have picked enough to ensure future Oregano is the produce only of the garden.
|
Posted on
 |
 |
|
Spring is just around the corner, an important time for the sowing of seeds and the growing of new crops of vegetables. Produce like broad beans, beetroot, garlic and shallots are planted, ready for the conditions brought by the warmer months. But what is becoming more of a worry is the rise of temperatures due to climate change and the damage this can bring. The unbearable heat can wilt the leaves of plants and they can literally be scorched and burnt in the sun. Here we give you some tips to help combat this: Preparation is Key… You’re likely to know when a heatwave is nigh as it will no doubt be warned of on the news. If you grow your own produce, it’s important to keep a closer eye out on the weather forecast, allowing you to help prevent the occurrence of any damage. Keep Healthy Plants Ensuring your plants are given the best chance at survival can be achieved through providing them with the healthiest conditions to grow in where you can. Having rich, quality soil in raised beds and using organic fertiliser will promote access to important nutrients. Planting in thoughtfully spaced triangles will prevent over crowing and actually save you time – as the vegetables will successfully compete against any weeds growing between. Keeping an eye on your garden as often as you can, will allow you to quickly notice and fix anything that doesn’t seem quite right. Creating Shade When the sun does arrive, and it is at its hottest – it is advisable to cover your plants and vegetables with any material which can block out and reduce exposure. This can be done using plants stakes and a dark cloth, by stretching it to cover the vegetables but leaving openings at each end to allow air circulation - you could also cover the plants directly using a lightweight muslin cloth. Alternatively, portable structures like Garden & Camping gazebos can be placed in various positions to protect the crops. You could even look at planting larger greenery like sunflowers, to give a natural source of shade to your plot. Controlled Watering During a heatwave, it is best to water plants either by hand using a watering can or with a soaker hose or drip line. This is to ensure that the water is reaching the soil beneath and should be done early in the morning, giving the vegetables the moisture they need to bear the heat. By using sprinklers, the water is likely only reaching the top leaves and not the root, even evaporating in its transit or settling and consequently causing scorching and burn. It is also important to remember to still water shaded areas as they too require hydration. Using Mulch A great way of cooling the soil is by using varieties of mulch. Biodegradable mulches include garden compost, leaf mould, spent mushroom compost, processed conifer bark or wood chippings. These help to improve the fertility and the structure of the soil. You could alternatively opt for non-biodegradable mulch, which still helps to limit weed growth and would usually come in the form of black plastic when used on a vegetable plot. We shall have to see what more extreme weathers 2020 has to bring, but hopefully these tips should allow your garden to remain healthy and thriving, even in the warmest of temperatures. |
Posted on
 |
 |
|
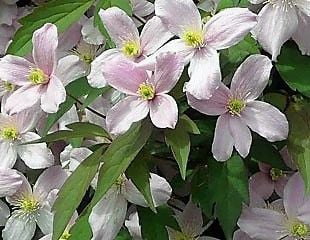
Group 1 Clematis montana Do not prune |
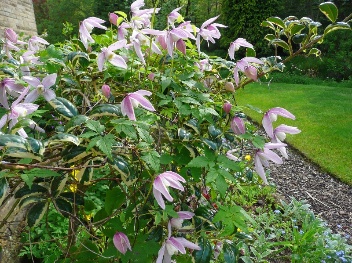
Group 1 Clematis alpina Do not prune |
|
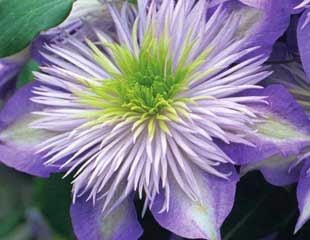
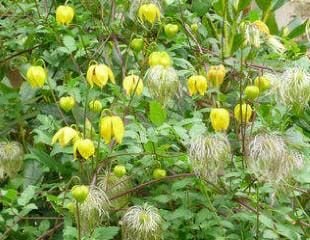
Are you putting off pruning Clematis ? then read on........ Late February and March is the right time to prune Clematis, except for any early flowering Clematis. The rule is if it flowers before June, don't prune. The first images are of Clematis montana and C. alpina which are the early flowering type of Clematis (called Group 1) and it is most important not to prune these. If you think about it, if a plant is to produce flowers in April and May cutting it back in March is going to remove all the buds. The Clematis which are pruned now are those which flower later so they have time to put on growth and make buds. This is the time to prune Clematis in Groups 2 & 3. The next two images are of Clematis Crystal fountain Group 2 and Clematis tangutica 'Bill MacKenzie' Group 3. These are Clematis which flower from midsummer onwards, group 2 in June onwards, Group 3 late summer around Late August and September. There is help on the website about how to prune Clematis and how to work out which type of Clematis you have https://www.sundaygardener.co.uk/how-to-grow-clematis.html and videos at The SundayGardener YouTube where there is a Clematis playlist https://www.youtube.com/playlist… |
|
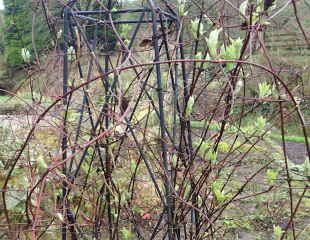
It can be disconcerting when pruning Clematis to see the new shoots, and then cut them off in the spring prune. How many are removed depends on whether the Clematis is a Group 3 (hard prune,) or Group 2 (lighter prune). |
 |
|
How many are removed depends on whether the Clematis is a Group 3 (hard prune,) or Group 2 (lighter prune). If you don't know what type of Clematis you have, check out Clematis pruning Groups 1,2 and 3 explained both on the website and video so that you can prune successfully and be rewarded with even more flowers in the summer. If you cannot remember when it flowered, unless you are confident it was after June, leave it alone. If it flowered "sometime in the summer" treat it as group 2. For next year take a photo of the Clematis in flower and note the month, this should enable you to identify it. If you get stuck drop the Sunday Gardener an email with the photo. |
|
Group 2 Clematis Cystal Fountain Lighter Prune |
Group 3 Clematis tangutica 'Bill MacKenzie' Hard Prune |
 |
 |