The blog

 RSS Feed

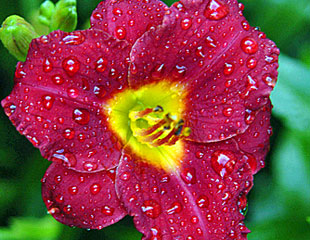
  1. hemerocallis-day--lily--night-whispers-310-x-240

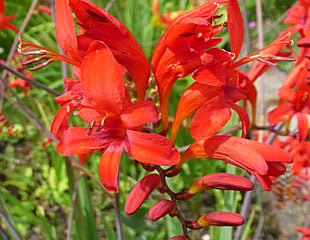
    crocosmia-close-up-310-x-240

    Autumn is a great time to work in the borders. The soil is still warm so its good for planting and it matters less what gets trampled on. It is an ideal time to take stock of the borders, move plants around and divide up herbaceous perennials.

    I have just dug out several elderly (5 years plus) perennials which didn't flower very well this season. These were mainly Hemerocallis, and Crocosmia illustrated left. Herbaceous perennials often get congested over time, especially in the centre of the plant.  The best thing is to dig them up, gently seperate a part of the plant  but with some it maybe necessary to cut up the plant. Replant a new healthy piece with more space and it should do better next year. I am trying to dig up anything which didn't do well last year and divide or replace. Some plants do well with time, some need dividing and others need replacing.

    Perennials suitable for dividing: Agapanthus, Hemerocallis (Day Lily,)  Salvia, Sedum, Verbena, Astilbe,  Hosta, Crocosmia, Delphinium, and Aster. The tell tale sign that the plant needs to be divided is a congested centre and flowering less each year. 

    I seem to spend most of October weeding trying to clear up the borders to put down a mulch for the winter. Mulching helps the plants over winter and come the spring will help to suppress the weeds. As plants die back more of the border is exposed which helps you spot the weeds and clear them out.

    Beyond that I am not a great fan of too tidy borders;  the garden is home to so many creatures they need somewhere to spend the winter. In amongst the shrubs are log piles and leaves, stones and sheltered corners.


  2. Selection of bulbs

    Last year's spring bulbs can be all mixed in together presenting a problem to know which bulbs are which. If you have stored the bulbs over the summer in spare containers, or even the original containers, chances are this year when you want to re use them and plant out or into containers, its really hard to know what the bulbs are. Looking at them are they Daffodil, tulip, or crocus?

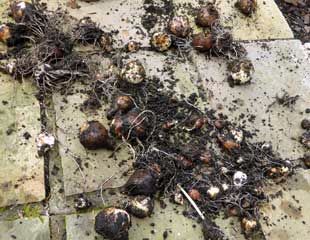
    One way to at least half solve the problem if you cannot identify the bulbs is to sort them into sizes. Broadly speaking different types of bulbs are different sizes. The first image left shows a collection of bulbs tipped out of a container from last year. They are all healthy bulbs, ready to be replanted, and will provide a good spring display.

    By sorting them into sizes such as the second image, which is all large bulbs, you have a prospect of planting similar types of bulbs together. 

    The larger of the bulbs are usually Hyacinth, followed by daffodil, and many tulips are largish bulbs. They are less likely to be Tulips because only a few varieties flower year after year. The smaller bulbs are usually iris reticulata , muscari, crocus and the smallest of all, snow drops.

    After sorting into sizes plant in layers, largest at the bottom of the container to get the depth of soil it requires (ideally 3x the size of the bulb,) and keep putting in layers with snowdrops and crocus on the top.

    The golden rule whatever you are planing is plenty of grit as in the image. Mix the grit with good compost. If the pot becomes water logged there is a risk the bulbs will rot and the extra grit helps to prevent this.

    Sort into similar sized bulbs
    Spring bulbs need plenty of grit


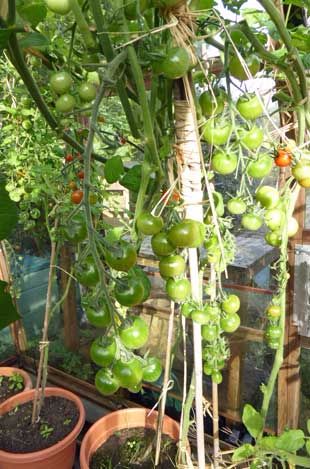
  3. denuded-toms-310

    As the season draws on, it can become harder to get tomatoes to ripen. The light levels are lower and the air tends to become moist, which can introduce more pests and diseases. I have always taken the secateurs to the leaves to keep thinning them out. I have always thought it a good policy to remove any crossing or compromised leaves to prevent diseases and to remove some leaves to raise light levels.

    Ken Thompson, who is a plant biologist with a keen interest in the science of gardening, (and writes some really interesting stuff around gardening)  has an article on the Telegraph about removing tomatoes leaves. Received wisdom has generally been to the effect that removing the lower, older leaves is good but research is now showing that when leaves were removed up to two trusses above the ripening truss, this meant the fruits were warmer and ripened earlier than those on plants where only lower leaves were removed,  none of which had any effect on yield. The full article is very interesting and well worth a read.

    Since I have always been quick to get out the secateurs around the tomato leaves, this gave me  a good reason to go out into the greenhouse and chop away. I have denuded the tomato plants of all leaves up to the second truss, and left the young growth in tact. It will be interesting to see what happens, frankly this year, with the poor summer the tomato plants need all the help they can get. The image left shows how the plants now look.

    If all else fails there is the sunday gardener fool proof way of ripening tomatoes at the end of the season.


  4. Tough Hosta Shredded Hosta Two-snails-too-many-310


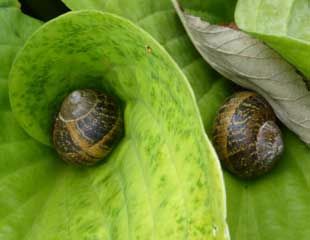
    Hosta are a lovely garden plant with lush green foliage in many shades of green from lime to blue. They are ideal for growing in shady areas, look very attractive set around a pond, and with ferns but they are slug and snail magnets.

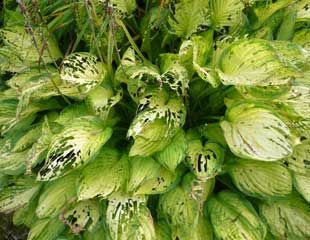
    Some gardens suffer more from slugs and snails than others, in which case pick the varieties of Hosta which is most resistant and not the centre one. The best resistant Hosta are those with tough ribbed leaves, as in image left or blue leaves in the image below and these types stand up best. The Hosta which seem to suffer the most have the thinner leaves, often green and cream variations.

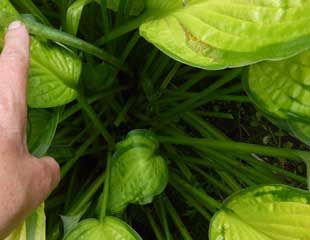
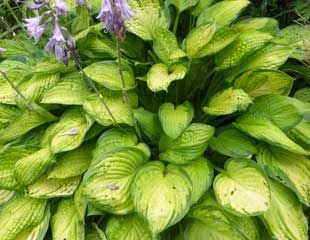
    To try and keep Hostas looking good you do need to keep an eye on them as not much can be done for the one in the centre image, well past redemption.  But if it is just a case of a few chewed up leaves, cut them off. The image bottom left shows that in the centre of the plant there are young leaves forming and if you cut off a few of the larger, damaged leaves, the new growth will come through. Later in the growing season, and these images are taken in August, you can see in the next image bottom centre that the plant still looks good even though about a dozen leaves have been cut off and the new ones will come through. Hosta do form a lot of leaves so by August it is safe to remove a few if they are badly chewed. The further image below shows two types of Hosta side by side and some real difference in how they look by later in the growing season.  The blue one is in much better shape.

    By later in the season the flowers on most Hostas look tatty and it is very tempting to cut them off, but inexplicably,  the bees continue to like them and as I walk past the plants several bees are landing on the sad looking flowers so best to leave them there.

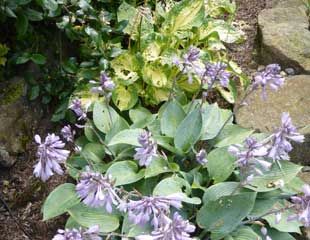
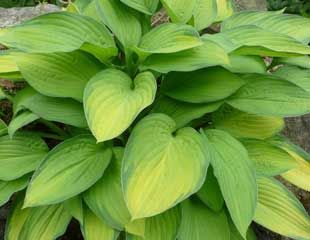
    Finally the further bottom images are a counter balance to the shredded Hosta leaves and a reminder of how lovely Hostas can look if the snails and slugs can be kept at bay.  More about growing Hostas


    The new growth in centre of Hosta Hosta after cutting off damaged  leaves Snail damage comparison on Hosta


    perfect lush Hosta Perfect blue hosta Rain on beautiful Hosta leaf